Exploring the Unseen:
Join My Journey Through the World of IT Administration
VMware ESXi 8.x aktualisieren
In meinem privaten Setup nutze ich VMware ESXi 8.x und finde es wichtig, mein System regelmäßig zu aktualisieren. Diese Updates bringen nicht nur neue Funktionen, sondern beheben auch potenzielle Sicherheitslücken. In dieser Anleitung wird der persönliche Ansatz zum Aktualisieren des ESXi 8-Servers geteilt. Es ist zu beachten, dass diese Anleitung auf individuellen Erfahrungen basiert und keine Empfehlung oder Garantie für Unternehmen oder professionelle Umgebungen darstellt.
Update Prozess
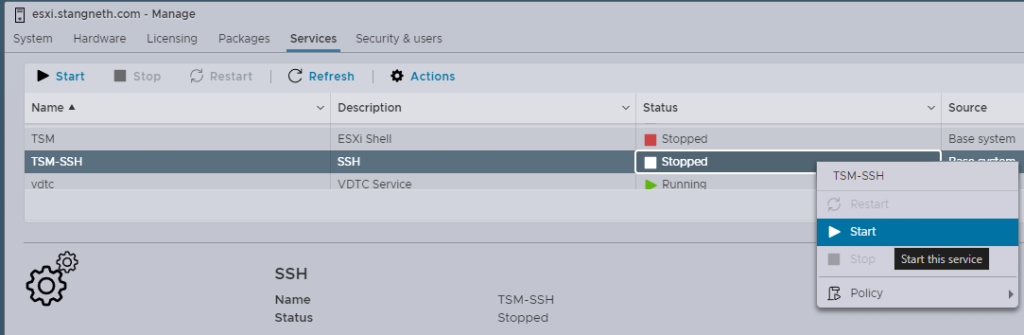
Aktivieren der SSH-Konsole: SSH aktivieren, um Befehle direkt einzugeben.
Anmeldung über Putty oder Konsole: Über Putty oder direkt an der Konsole als Benutzer ‚root‘ anmelden.
Überprüfen der aktuellen Version: Aktuelle ESXi-Version mit vmware -vl anzeigen.
HTTP-Zugriff aktivieren: Für das Online-Update HTTP-Zugriff erlauben:
esxcli network firewall ruleset set -e true -r httpClient
Verfügbare Profile/Depots identifizieren: Verfügbare Updates anzeigen:
esxcli software sources profile list -d https://hostupdate.vmware.com/software/VUM/PRODUCTION/main/vmw-depot-index.xml | grep -i ESXi-8.0
Updates können auch manuell von der VMware-Website heruntergeladen werden. Nach dem Herunterladen kann die Datei in ein von Ihrem ESXi-Host zugängliches Datenspeicher hochgeladen werden. Um den Profilnamen der Update-Datei zu überprüfen, was wichtig für die Kompatibilität und das Verständnis der spezifischen Details des Updates ist, kann der folgende Befehl verwendet werden:
esxcli software sources profile list -d /path/to/your/updatefile.zip
Wechsel in den Wartungsmodus: Alle VMs herunterfahren und in den Wartungsmodus wechseln:
esxcli system maintenanceMode set --enable true
Update durchführen: Update mit folgendem Befehl ausführen:
esxcli software profile update -d https://hostupdate.vmware.com/software/VUM/PRODUCTION/main/vmw-depot-index.xml -p [Name_Version]-standard --no-hardware-warning
Beispiel:
esxcli software profile update -d https://hostupdate.vmware.com/software/VUM/PRODUCTION/main/vmw-depot-index.xml -p ESXi-8.0U1a-21813344-standard --no-hardware-warning
Die Software wird direkt von VMware heruntergeladen und installiert. Dies kann einige Minuten dauern.
Fehler überprüfen: Nach dem Update auf Fehler prüfen. Sollte es keine geben wird eine Meldung zum Neustarten angezeigt.
HTTP-Zugriff deaktivieren: HTTP-Zugriff aus Sicherheitsgründen deaktivieren:
esxcli network firewall ruleset set -e false -r httpClient
Wartungsmodus beenden: Wartungsmodus verlassen:
esxcli system maintenanceMode set --enable false
Keine Kommentare zu VMware ESXi 8.x aktualisieren